
How to Make Fruit Leather is a fun and simple thing you can do at home. It is a sweet, chewy snack made from real fruits. Kids love it, and grown-ups enjoy it too! The best part? You don’t need many things to make it.
How to make fruit leather at home is also a smart way to use ripe fruits. Instead of throwing them away, you can turn them into a yummy treat. It’s a healthy snack because it has no fake sugar or colors. You can keep it for weeks and take it anywhere, like school or a picnic.
What Is Fruit Leather and Why Is It So Popular?
Fruit leather is a yummy snack made from mashed fruits. It is soft, chewy, and sweet like candy, but it is made with real fruit. Many people like it because it is healthy and easy to eat. You can carry it in your bag, lunchbox, or even in your pocket. It does not melt like chocolate and stays good for many days.
This snack is great for both kids and adults. Parents love giving it to children because it has no fake colors or flavors. You can make it at home or buy it from the store. But making it at home is better because you can choose the fruits you like. You can also skip the sugar and make it your way.
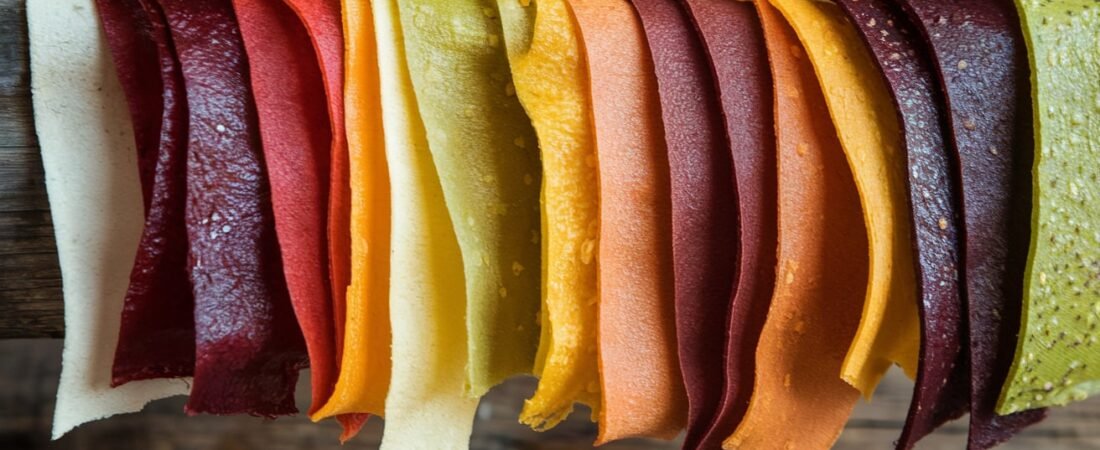
The name “fruit leather” comes from how it looks. It is flat and smooth, just like leather. But don’t worry—it tastes nothing like real leather! It tastes fruity and fun. Many people like to roll it up and eat it like a fruit roll. Others cut it into small pieces and share it with friends.
How to Make Fruit Leather: Tools and Ingredients You’ll Need
To begin learning how to make fruit leather, you don’t need many things. Most tools are already in your kitchen. The main things you need are fruits, a blender or food processor, a baking tray, parchment paper, and an oven or dehydrator. Some people even use just the sun to dry their fruit leather!
Choose fruits that are soft and ripe. These fruits are sweet and easy to blend. You can use apples, mangoes, bananas, berries, or peaches. Wash the fruits well and remove any seeds or skins if needed. You can mix different fruits too. This gives your fruit leather a fun new taste.
If your fruit mix is too sour, you can add a little honey or maple syrup. But only a little is enough. Don’t add too much sugar, because fruits already have natural sugar. You can also add lemon juice to help keep the color fresh. It also gives a nice tangy taste.
Make sure to line your tray with parchment paper before pouring the fruit mix. This helps it not stick while drying. Now you are ready to follow the next steps in how to make fruit leather at home. It’s simple, fun, and healthy!
Step-by-Step: How to Make Fruit Leather in Your Kitchen
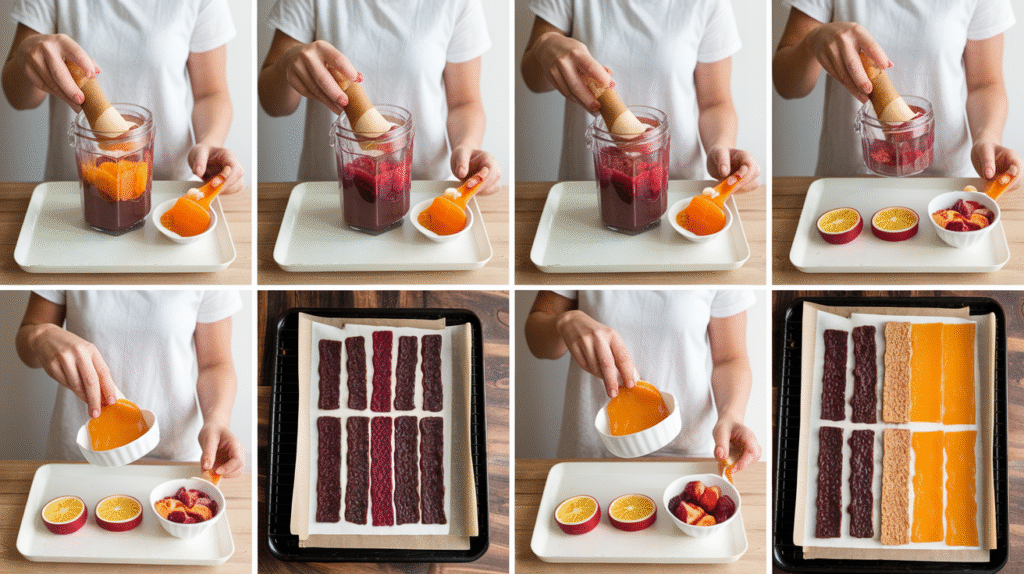
The first step is blending the fruits. After washing and cutting your fruits, put them in a blender. Blend until it becomes smooth like a thick juice. If it is too thick, you can add a small spoon of water. This helps it spread better on the tray.
Next, line your tray with parchment paper. Pour the fruit mix onto the tray and spread it thin and even. Use a spoon or spatula to make the layer flat. Try to keep it the same thickness so it dries evenly. A thick layer will take too long to dry.
Now, it’s time to dry the fruit mix. Place your tray in the oven at a very low heat—around 140°F (60°C). Leave the oven door slightly open to let the air move. It will take 6 to 8 hours to dry. If you use a dehydrator, follow the instructions that come with it.
When it’s done, the fruit leather should not feel wet. It should be smooth and a little sticky. Let it cool, then peel it off the paper. You’ve just learned one full method of how to make fruit leather in your own kitchen. Isn’t that fun?
How Long to Dry Fruit Leather and How to Know It’s Ready
Drying takes time, but it’s easy if you are patient. When learning how to make fruit leather, drying is one of the most important parts. If you dry it too short, it stays wet. If you dry it too long, it becomes too hard or cracks.
In most ovens, fruit leather takes about 6 to 8 hours to dry. If you use a dehydrator, it may take a little less. Always use low heat and check it every hour after the fifth hour. The fruit should feel dry but still soft and bendy.
To test if it’s ready, touch the middle with clean fingers. If it doesn’t stick to your hand and peels off the paper, it’s done. Don’t cut or roll it while it’s hot. Let it cool first. Cooling makes it firmer and easier to cut or roll.
Many people think the longer the better, but that’s not true. You just want it to feel like leather—not wet and not crunchy. Learning the right time is key in mastering how to make fruit leather the right way.
Best Fruits to Use When Learning How to Make Fruit Leather
Some fruits work better than others for fruit leather. If you’re new to how to make fruit leather, start with soft, sweet fruits. Mangoes, strawberries, peaches, and apples are all great. Bananas also give a creamy feel.
Berries are tasty, but they have seeds. You can blend them and then use a strainer to remove the seeds. Apples and pears are not very juicy, so it’s good to cook them a little before blending. This helps make a smoother mix.
Try mixing different fruits to make fun flavors. Mango and pineapple make a tropical taste. Strawberry and banana are sweet and creamy. Use what you have at home. Overripe fruits are perfect for this because they are soft and sweet.
Don’t forget to taste your fruit mix before drying. If it’s too sour, add a little honey. Starting with good fruits makes it easy to enjoy how to make fruit leather at home with your favorite flavors.
How to Make Fruit Leather Without a Dehydrator
You don’t need fancy tools to make fruit leather. Many people ask how to make fruit leather without a dehydrator. The good news is that you can use your oven or even the sun if it’s hot and dry outside.
Set your oven to the lowest heat, usually 140°F (60°C). After spreading the blended fruit on a tray, place it in the oven. Keep the door slightly open for air. It may take 6–8 hours, but it’s safe and simple.
If you want to use sunlight, make sure it’s a hot day with no clouds. Put your tray in a sunny spot with a screen or thin cloth on top to keep bugs away. This way may take a whole day or two, but it works fine.
Even without a dehydrator, you can enjoy how to make fruit leather easily. Just be patient and watch it closely. With a little care, you’ll get the same chewy snack with no fancy machines.
How to Store Homemade Fruit Leather So It Stays Fresh
Once you’ve made your fruit leather, you want it to stay fresh. After all the work in learning how to make fruit leather, you don’t want it to go bad quickly. The good news is—it stores well if you pack it right.
Let the fruit leather cool first. Then roll it in the same parchment paper or cut it into strips. You can place the pieces in plastic bags or airtight containers. Keep them in a cool, dry place like a cupboard.
If you want to save them for longer, put the rolls in the fridge. They can last for weeks. You can also freeze them if you want to keep them for a few months. Just make sure to take out all the air before freezing.
Good packing is key after you learn how to make fruit leather. With the right storage, you can enjoy this tasty snack anytime you want—even after weeks!
Common Mistakes When Making Fruit Leather and How to Fix Them
Some mistakes to watch out for:
- Using thick fruit mix
A very thick blend takes longer to dry and may not dry evenly. - Too much sugar
Adding too much sugar makes it sticky and hard to dry. - Oven too hot
High heat can burn the fruit mix or make it crispy.
Sometimes people try how to make fruit leather for the first time and feel sad when it doesn’t turn out right. That’s okay! The trick is to learn and try again. One common mistake is spreading the fruit too thick. It needs to be thin and even.
Another mistake is using fruits that are too sour or not ripe. This makes the leather taste bad. Always use sweet, ripe fruit. If the fruit isn’t sweet enough, add just a tiny bit of honey—not too much. Also, don’t set your oven too hot or it will burn.
Practice makes perfect when learning how to make fruit leather. Every batch helps you learn something new. Don’t be afraid to try again!
Fun Ideas: Add Flavors and Shapes to Your Fruit Leather
Creative fruit leather tips:
- Use cookie cutters for shapes
Make stars, hearts, or circles for lunchbox fun. - Add spices
Try cinnamon, vanilla, or even a pinch of ginger. - Layer different fruits
Make pretty stripes with mango and berries.
If you’re feeling creative while learning how to make fruit leather, try adding fun things to your mix. You can add a little cinnamon, vanilla, or nutmeg for a new flavor. Some people even mix vegetables like carrot with fruit for extra health.
You can also play with colors. Try making layers with different fruits. Put mango on one side and strawberry on the other. It looks nice and tastes great. You can even cut shapes with cookie cutters once it’s dry.
Fruit leather doesn’t have to be boring. After you learn how to make fruit leather, try new flavors and ideas. It’s a fun project for kids and adults!
Conclusion
Making fruit leather at home is easy and fun. Now you know how to make fruit leather using simple fruits, a blender, and your oven. It’s a sweet, chewy snack that is good for you and tastes great too. You don’t need to buy it from the store anymore!
When you make it at home, you know what’s inside. No fake colors, no extra sugar—just real fruit! You can try new fruits, fun shapes, and flavors. Try it today, and share this yummy snack with your family and friends!
FAQs
Q: Can I make fruit leather without an oven?
A: Yes, you can dry it in the sun or use a food dehydrator if you don’t have an oven.
Q: How long does homemade fruit leather last?
A: It can last up to 2 weeks in a container or even 1–2 months in the fridge.
Q: What fruit is best for making fruit leather?
A: Mango, apple, strawberry, banana, and peach are great choices.
Q: Is fruit leather healthy for kids?
A: Yes! It’s made from real fruit and has no bad stuff when you make it at home.
Q: Can I freeze fruit leather?
A: Yes, you can freeze it! Just wrap it well and keep it in a freezer bag.